Paint the Trim First, Then the Ceilings and Walls
Finally, the answer we’ve all been waiting for! Pros usually follow a certain order when painting a room. They paint the trim first, then the ceiling, then the walls. That’s because it’s easier (and faster) to tape off the trim than to tape off the walls. And you certainly don’t want to tape them both off!
When painting the trim, you don’t have to be neat. Just concentrate on getting a smooth finish on the wood. Don’t worry if the trim paint gets slopped onto the walls. You’ll cover it later when painting walls. Once the trim is completely painted and dry (at least 24 hours), tape it off (using an ‘easy release’ painter’s tape), then paint the ceiling, then continue on to wall painting.
How To Avoid Lap Marks when Wall Painting
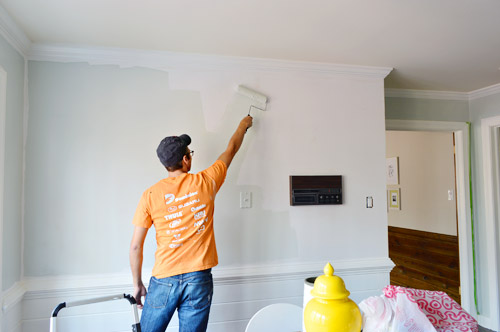
To avoid lap marks, roll the full height of the wall and keep a wet edge. Lap marks are those ugly stripes caused by uneven layers of paint buildup, a common problem when wall painting. They occur when you roll over paint that’s already partly dry. (In warm, dry conditions, latex paint can begin to stiffen in less than a minute!) The key to avoiding lap marks is to maintain a ‘wet edge,’ so each stroke of your roller overlaps the previous stroke before the paint can begin to dry.
To maintain a wet edge, paint an entire wall all at once. Start at one end, running the roller up and down the full height of the wall, moving over slightly with each stroke. Move backward where necessary to even out thick spots or runs. Don’t let the roller become nearly dry; reload it often so that it’s always at least half loaded. Keep the open side of the roller frame facing the area that’s already painted. That puts less pressure on the open side of the roller, so you’re less likely to leave paint ridges.
Clear the Entire Room Before Painting
If something is too big to take out, move it to the centre of the room and cover it with plastic. Use canvas drop cloths. Unlike plastic, they stay put without tape and aren’t slippery.
Avoid Drips as you Paint
Masking tape does a good job of protecting woodwork—if it’s applied well.
Clean off all the dirt and grime along the edge of the trim with a damp rag. Hold the tape tight against the wall and roll it out so the tape covers the edge. Press the tape against the wood with a putty knife along the entire length. Use painter’s tape that’s at least twice as wide as the trim and leave it flared out to protect the face of the trim from drips. When you’re done, either remove the tape immediately while the paint is still wet or wait until the next day when it’s totally dry. If you pull it free when the paint is partially dry, you may peel off bits of fresh paint along with the tape.
Run a Crisp Bead of Caulk Between Woodwork and Walls
Apply a thin bead of paintable acrylic latex caulk only inside the crack where wood meets a wall for a smooth, professional appearance. Remove extra caulk with a putty knife. And buy a dripless caulk gun to save time and frustration. Cut the tip smaller than you think you need.
